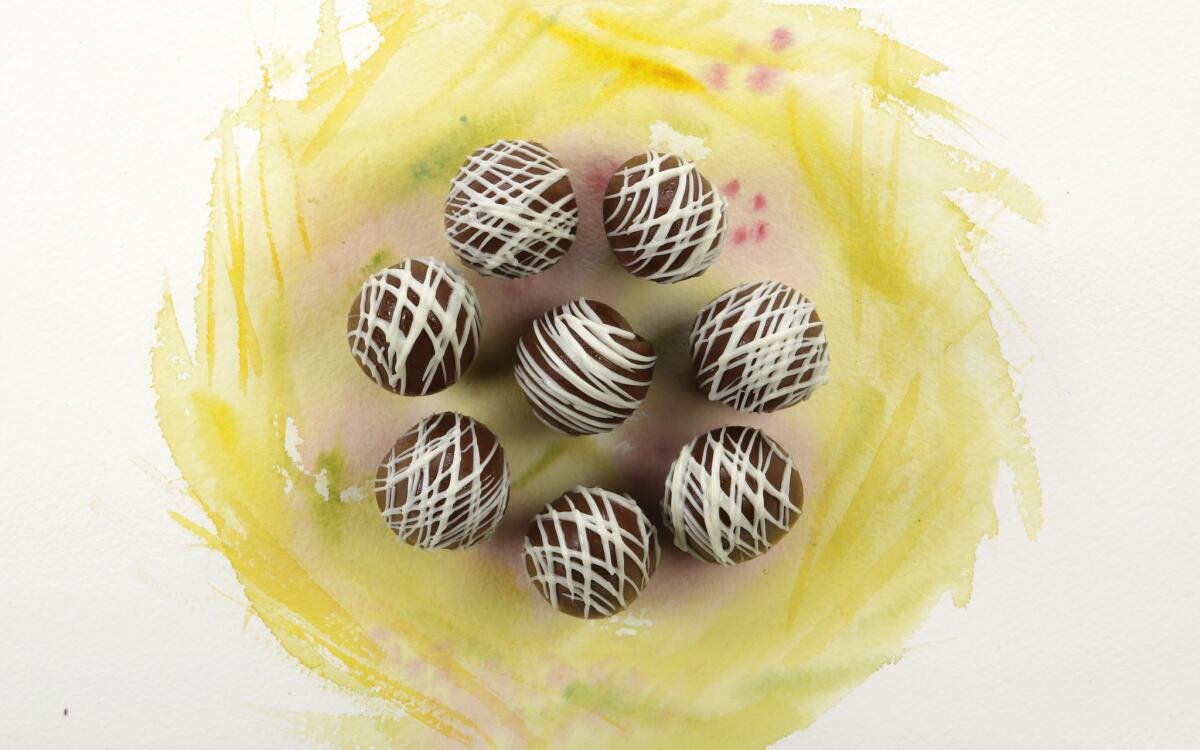
Chocolate creme eggs
Maybe it was the 12 pounds of chocolate. Or the 40 pounds of sugar. Not to mention all the cream, milk and corn syrup — and the two dozen vanilla beans. My little project was turning into more of an obsession. Little project? I was only trying to re-create the Cadbury Creme Egg.
Introduced by British chocolate-maker Cadbury almost half a century ago, the Creme Egg, like Peeps, signifies Easter from a confectionary standpoint. A thin layer of festively colored foil peels away to reveal a dense milk chocolate shell shaped like a smallish egg. Unassuming at first, the plain shell lacks the sheen and snap typical of commercial chocolate, but it takes just one bite to tell this chocolate is richer, not overly sweet, almost fudge-like. The initiated know to carefully nibble through the shell to the sweet gooey filling — creamy white at first, then a vibrant yellow in the center. It’s a confectionary wonder, available just a few months of the year.
With Cadbury in the news lately — devoted fans decrying altered chocolate formulas, shrunken egg sizes, halted imports — we here in the L.A. Times Test Kitchen wondered how hard it might be to make the eggs from scratch.
Online recipes for Cadbury-like eggs are plentiful, and we tried a number of them. Many of the simpler variations include no-cook fillings involving powdered sugar, butter and corn syrup. And while those fillings were soft and delicate, none quite replicated the flavor or gooey texture of the commercial egg.
The Cadbury egg is a classic chocolate confection with a soft fondant center, similar to cherry cordials or what you might find in a box of chocolates. To replicate the egg, you need to start with the right filling.
Thirty batches of fondant and hundreds of eggs later — what did we find?
Essentially, fondant is nothing more than a cooked sugar syrup that is crystallized. Ingredients, ratios and cooking temperatures help to determine the fondant’s final consistency. For candies, the syrup is cooled, then stirred or kneaded to a putty-like consistency before using.
Finding the right fondant — and those right ratios and cooking temperature — was key to re-creating the egg. After trying a few recipes, we settled on a cream fondant from the excellent book “Candymaking” by Ruth A. Kendrick and Pauline H. Atkinson. It includes heavy cream and milk, lending a richness and depth of flavor not normally found in standard water-based sugar fondants. For extra flavor, we tossed in vanilla seeds.
Over the course of a couple of weeks, we tested batch after batch of fondant, tweaking and fine-tuning temperature and cooling methods. A change of just one degree in cooking temperature can affect a fondant’s final texture. Too firm and it’s too hard to knead; too soft and it won’t hold an egg shape.
Another factor was invertase, which is added to get the soft centers in many candies, and its ratio to fondant. Invertase is a natural enzyme derived from yeast that basically liquefies sugar (it breaks down sucrose into two simple sugars, glucose and fructose). But it takes time to work — typically a few days at room temperature to properly liquefy a filling. Candy, after all, has its own particular chemistry.
We formed egg after egg, each batch labeled for testing (read: eating) every day. Running out of room in the kitchen, I stored the overflow at my desk — under a “Do not eat this” sign — checking daily, in a sugar-induced haze, to see how the eggs progressed.
Fine-tuning the filling, the tests moved to the chocolate. Our trials until now had involved a combination of standard semisweet chocolate bars and chips, but the real eggs needed British-made Cadbury Dairy Milk Chocolate. With imports practically halted, sourcing the chocolate — which I finally found at a British import shop — felt like some weird Anglophile drug deal.
I made the last batch over a quiet weekend, forming, freezing and coating each egg with solemn veneration. And then I decorated them. Because sometimes you just have to celebrate your obsessions with a spray gun and some sparkly paint, don’t you?
In a large, heavy saucepan, combine the cream, milk, corn syrup, sugar and salt over medium-high heat. Cook, stirring occasionally, until the mixture comes to a boil. If any sugar crystals begin to form on the edges of the pan, wash down the sides with a wet pastry brush.
Insert a candy thermometer into the mixture and continue cooking until the syrup reaches 243 degrees. Remove from heat and pour into a clean 13-by-9-inch baking dish. Cool to room temperature.
Add the vanilla seeds and invertase. Begin stirring the fondant with a bench scraper or wooden spoon, working the fondant until the ingredients are completely incorporated. Move the dish, uncovered, to the refrigerator until the fondant is cold. Work the fondant again (it will be thickened and somewhat stiff), stirring and then kneading until it is smooth and has lost its sheen.
Separate 1/3 of the mixture; this will become the yellow centers of the eggs. Add a few drops of yellow food coloring and knead the coloring into the fondant, dusting your hands and work surface with powdered sugar to keep the fondant from sticking. Form the fondant into a thin, flat disk; cover tightly with plastic wrap and freeze until the fondant is firm, at least 2 hours. Meanwhile, form the remaining white fondant into a thin flat disk and freeze until very firm.
Form the “yolks”: Measure 1 teaspoon of the yellow fondant and roll it in a ball (if the fondant is sticky, flour your hands with powdered sugar). Repeat with the rest of the fondant, placing the yellow balls on a parchment-lined rimmed baking sheet lightly dusted with powdered sugar. Work quickly, as the fondant will become very sticky as it warms up; if necessary, freeze the fondant until firm before continuing. Freeze the balls, uncovered, until firm, 30 minutes to an hour.
Meanwhile, measure 2 teaspoons of the remaining white fondant to form each of the “egg whites.” When the yellow balls are firm, form the whites around each of the balls, molding the white fondant into an egg shape. Transfer the eggs to a parchment-lined rimmed baking sheet lightly dusted with powdered sugar. Gently insert a wooden skewer through the center of the egg, at the larger end, and push the toothpick through just over half the length of each egg. Freeze the eggs, uncovered, until very firm, at least 2 to 3 hours, preferably overnight.
Melt the chocolate in a bowl set over simmering water. Transfer the melted chocolate to a small deep bowl (this will make it easier to coat the eggs). Working 1 to 2 eggs at a time (keep the rest frozen until ready to coat), quickly dip the eggs in the chocolate to coat, gently tapping the skewer on the rim of the bowl to shake off excess chocolate. Press the toothpicks onto a piece of foam to allow the chocolate to settle and harden. The chocolate should harden quickly; if it takes a while to set, place the eggs back in the freezer just until the chocolate is hard.
Remove and discard the toothpicks from each of the eggs, then add a small dollop of chocolate to seal the holes. Place the eggs aside in a cool, dry place to set completely. The eggs can be eaten right away; the invertase should soften or liquify the filling within 3 to 5 days at room temperature.
Get our Cooking newsletter.
Your roundup of inspiring recipes and kitchen tricks.
You may occasionally receive promotional content from the Los Angeles Times.


