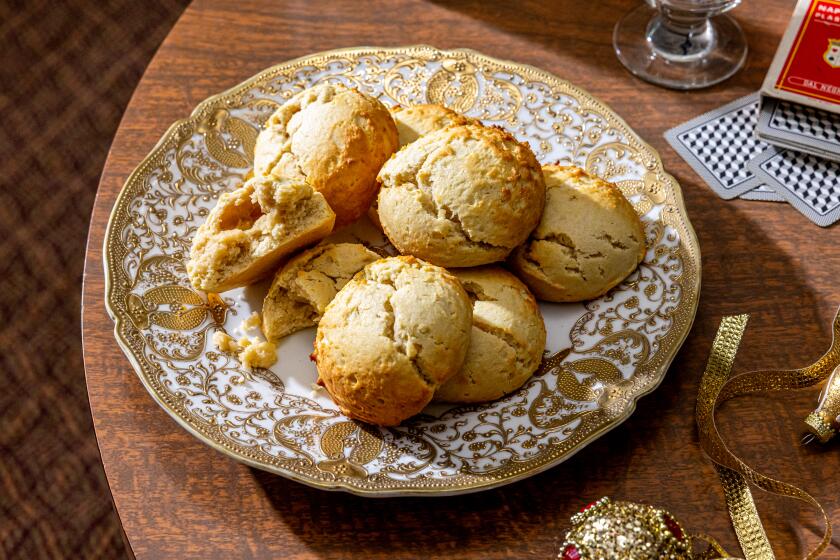
Dinner rolls
A slow-food friend of mine likes to drive guests crazy trying to guess just what it is -- maybe it’s a dissolved sliver of Spanish anchovy to deepen that super-meaty sauce, or some microscopically minced tarragon to perfume those deviled eggs, or a little bit of freshly grated horseradish to spike the coleslaw.
But flavor isn’t the only way surreptitious little additions can astonish at first bite. Think texture: a crunch bigger than expected, a crispness that lasts, a crumb more delicate than imagined -- all with the mere sprinkle of extra-fine flour.
If you don’t already have some in the pantry, you should. Rice flour, potato flour and cornstarch -- perhaps most familiar as reliable thickeners for sauces and pie fillings -- can transform a batter or dough simply by standing in for some of the regular flour. They’ll give things a lighter feel, a welcome idea in the hotter months.
These finely milled flours, made from such down-to-earth foods as potatoes, corn and rice, can transform a recipe. Sprinkle away and fritters turn beautifully crisp, dinner rolls go tender, shortbread melts in the mouth. They can lend a wonderful sandy texture to cookies or tart crusts, and a crisp coating for fried fish or vegetables.
Take shortbread, whose unmistakable texture comes from a 1-2-3 combination of one part sugar, two parts butter and three parts flour. When some of that flour is replaced with rice flour or potato flour, the cookie bakes up with a delicate crumbliness.
It’s for this reason that Scottish shortbread recipes often call for rice flour. However, potato flour works similarly to make the cookie more delicate. Many formulas allot just a couple of tablespoons or so per cup of regular flour. But by pushing this ratio higher, and replacing the granulated sugar with powdered sugar (which, by the way, routinely contains a little cornstarch to prevent clumping), you get shortbread that’s ethereally tender yet still crumbly.
You can play with that ratio to shift the balance between these two textures, but don’t get carried away. Use too much fine flour, and you’ll scare the shortbread into a chalky fright. The ratio in the recipe here pushes the amount just to the edge.
Delicate crust, better batter
You don’t need to go to the edge, though, to apply this idea to tart crusts -- not the kind you roll out, but the crumbly ones that you press into a pan much like the base of lemon bars (it’s no coincidence these crusts bake into cookie-like bases.) It’s what the French call a pate sablee, for the dough’s sandy texture. Substitute a bit of fine flour, and the crust becomes more delicately sandy.
For a great fritter batter, an easy ratio of 1 to 1 is all you need to remember. So if you’re making substitutions, just swap out half the recipe’s regular flour with white rice flour. Essentially finely ground grains of rice, it gives fritters a more pronounced crispness that lasts longer than using regular flour alone. It’s a nice bit of insurance that the first batch out of the pan won’t go soggy by the time the last one’s done. It works well in other frying batters too, making crisper coats for fish or shrimp, or vegetables such as onions and zucchini -- just as cornstarch does when used instead of flour for dredging.
With corn season in full swing, this half-and-half batter is a perfect summer surprise. A fritter recipe from Bill Granger’s “bills food” envelopes fresh, sweet kernels in little pancakes spiced with coriander, cumin and fresh cilantro. The batter makes a fritter that fittingly is what you’d expect from the summer’s best corn: crisp at first bite, tender within and bursting with flavor.
You can make a sweet and tangy chile sauce to play off the savory fritters. Or take a shortcut with a good bottled version of sweet Thai chile sauce (Mae Ploy brand is widely available), which you can thin with a little rice vinegar for a nice pucker.
The first time I made these fritters, I was heavy-handed in measuring the rice flour. My batter was too thick to hold all the kernels, and a few of them flew out of the hot pan like mini maize missiles. Happily, negotiating peace was easy enough -- I just added a touch more water to the remaining batter.
So as with regular flour, it’s best to use a light hand in measuring a finer flour. Stir it up to aerate and break up any clumps, spoon into a measuring cup and level off. Just because they’re light doesn’t mean you need more. After all, the very nature of starches and flours is that they’re concentrated versions of their original selves.
A third of a cup of potato flour, for example, is roughly the distilled version of a cup of mashed potatoes. Potato flour and potato starch, by the way, are not exactly the same thing -- just as cornstarch and cornmeal are different (the first comes from just the starchy center of the corn and is also known as corn flour, the latter is made from the entire kernel). Potato flour is made from whole cooked potatoes that have been ground and dried. And potato starch is simply the carbohydrate portion of the potato in powder form.
However, potato flour is made up mostly of potato starch. And in a relatively small amount, such as the portion in dinner rolls, I’ve found them to be interchangeable -- and the two are especially handy because they dispense with the steamy task of having to boil and mash a potato.
Like potatoes, potato flour gives these rolls a subtle earthy flavor and, more important, a greater ability to hold moisture. That’s why potato bread is so belovedly soft, and why many gluten-free recipes rely on this flour. So it seemed just the thing for making old-fashioned rolls -- I’m talking plump pillows here and not crusty orbs.
Enriched with buttermilk for extra tenderness, this is an easygoing yeasted bread. It comes together in a jiffy with an electric mixer (or a wooden spoon will do the trick). And it barely needs kneading. Best of all, it’s easy to handle and won’t take over your day.
You can always tuck it in the fridge until you’re almost ready to bake.
Potato starch works in this recipe too, as along as you aren’t after a distinct potato taste. Whichever you use, you’re under no obligation to reveal what you’ve got up your sleeve.
In a large bowl, stir together the potato flour, whole wheat flour, yeast, salt, sugar and one-half cup of the flour. Add the warm buttermilk, melted butter and egg. Beat at low speed for 30 seconds. Scrape down the sides and bottom of the bowl, then beat at high speed for 3 minutes. Reduce the speed to low. Gradually add the remaining flour, about one-half cup at a time, scraping the bowl between additions. The dough will come away from the sides of the bowl.
Turn out onto a lightly floured surface (if there are any dry bits at the bottom of the bowl, discard them). Knead the dough for a couple of minutes until smooth and elastic; if it’s too sticky, sprinkle flour as needed.
Place in a greased bowl. Turn over to grease the top, and cover. Let rise until double in size, about 1 to 1 1/2 hours.
At this point, you can refrigerate the dough until you are ready to bake. First, deflate the dough by pressing down the middle and pulling the sides toward the center. Turn it over in the bowl, then brush the top with melted butter or press a piece of plastic wrap against the surface to prevent a crust from forming. Refrigerate, tightly covered, for up to 48 hours. Punch down and let stand at room temperature for about an hour. Proceed with the next step at least 2 hours before serving.
Line a baking sheet or large baking pan with parchment paper or a silicone mat. Turn the dough out onto a lightly floured surface. Pat it into an 8-inch square, about an inch high. Using a sharp knife and a downward motion, cut the dough into 16 (2-inch) squares. Form each square into a ball, then pull down the sides to create smooth tops and firmly tuck the edges underneath.
Arrange the rolls on the lined sheet with the sides almost touching. Cover loosely with plastic wrap and allow to rise until double in size, about 30 to 45 minutes. They should look like puffy cushions.
Heat the oven to 350 degrees. In a small bowl, beat together the egg yolk and 1 tablespoon water to make a glaze. Gently but thoroughly brush the tops of the rolls (you will have some glaze left over). Bake until golden brown, about 20 minutes. Serve warm, or cool on a rack.
Get our Cooking newsletter.
Your roundup of inspiring recipes and kitchen tricks.
You may occasionally receive promotional content from the Los Angeles Times.

